


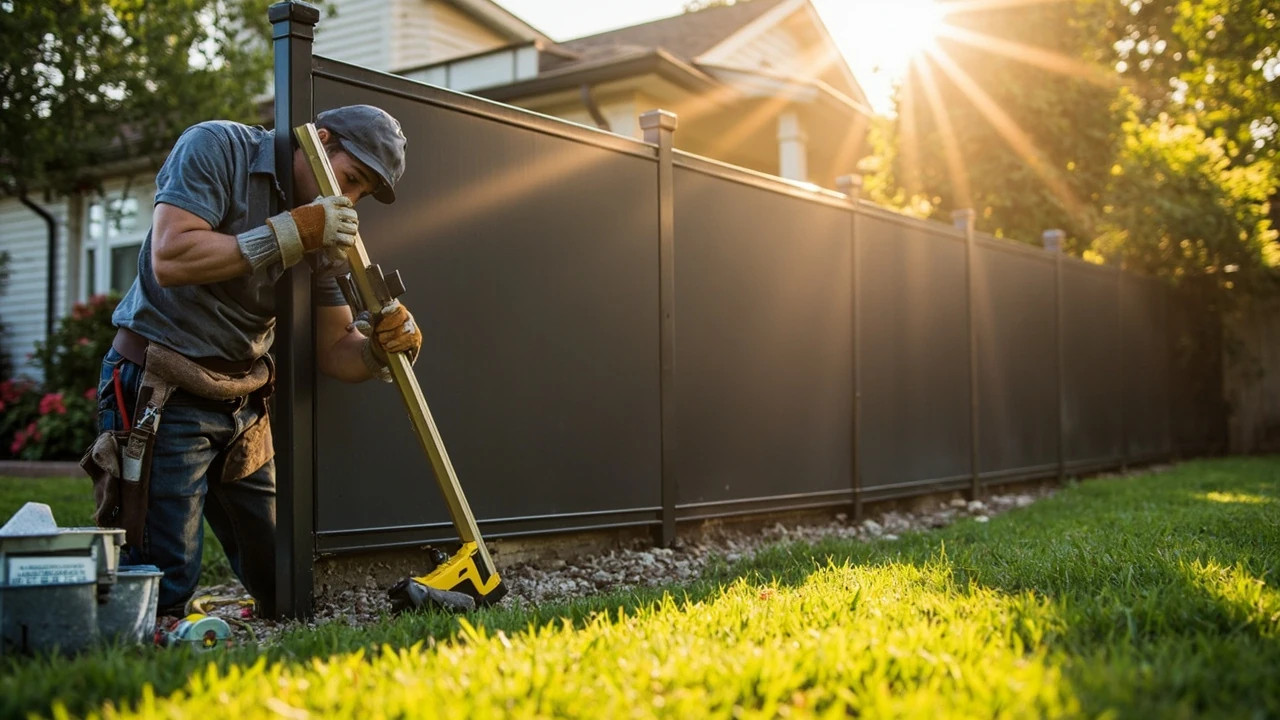
Metal fence installation: a practical guide for homeowners
A new fence usually starts with a single frustration. A dog keeps slipping through the chain link, the neighbor’s sightline has become a little too familiar, or a side yard needs a clean boundary before a landscaping project can move forward. Whatever the trigger, most homeowners arrive at the same question: how do I plan a metal fence installation so it looks right, holds up, and doesn’t turn into a season-long project?
Metal fencing covers a wide range of products, from decorative aluminum panels around a garden to heavy steel privacy panels along a property line. The mechanics of installation are similar, but the choices that affect cost, durability, and appearance are very different. This guide walks through the decisions a homeowner actually has to make, in the order they tend to come up, with practical checks at each step.
Where metal fence installation makes sense
Metal fence installation is a good fit for several common situations, and a poor fit for others. The material earns its keep where the ground shifts, where the climate punishes wood, or where the design needs clean, modern lines.
For most residential properties, metal works well in these cases:
- Privacy or security along a back or side property line, where a solid metal panel system replaces aging wood.
- Pool enclosures, where aluminum or powder-coated steel pairs with code-required self-closing gates.
- Sloped or uneven yards, where rackable metal panels can follow the grade without stepped terraces.
- Coastal or humid regions, where galvanized or aluminum fencing outlasts untreated wood.
- Modern architectural homes, where thin metal pickets or matte black steel panels match the design language better than a stockade fence.
Metal is less attractive when the priority is a rustic, low-cost boundary, when the fence will be replaced within a few years, or when a homeowner association requires a specific wood-look product. In those cases, the metal premium buys features the project does not actually need.
Types of metal fencing used in residential projects
Before pricing or scheduling anything, it helps to know the major product families. Each one behaves differently during installation and in service.
| Type | Typical material | Common heights | Strengths | Limitations |
|---|---|---|---|---|
| Aluminum ornamental | Powder-coated aluminum | 3 ft to 6 ft | Lightweight, rust-free, easy to handle | Not a privacy fence; thinner wall than steel |
| Steel panel (galvanized) | 26- to 29-gauge galvanized steel | 4 ft to 8 ft | Strong, paint holds up, modern look | Heavier, harder to cut, panel sizes can limit odd layouts |
| Wrought iron style | Solid steel with welded or assembled sections | 4 ft to 8 ft | Very strong, traditional look | Heavy, often pricier, needs rust management |
| Chain link with metal posts | Galvanized or vinyl-coated steel | 3 ft to 8 ft | Lowest cost, quick install | Low privacy and curb appeal |
| Metal frame with infill | Steel frame with wood, composite, or mesh | 4 ft to 8 ft | Mixes materials for a custom look | More parts, longer install, more labor |
The label “metal fence” can mean any of these. The right pick depends on whether the goal is privacy, ornament, security, or a budget boundary. A simple, useful question to start with: is the fence the visual centerpiece of the yard, or is it meant to disappear behind plantings?
Planning a metal fence installation before you dig
Most failed installations trace back to a planning step that was skipped, not a product that was bad. A few hours of preparation saves a full weekend of rework.
Confirm the property line and check local rules
Before any layout work, confirm the actual property line. A survey or a recorded plat is the cleanest source. Fences built even a few inches off the line can force a costly move and can also create tension with neighbors. At the same time, call the local building or planning office to ask about:
- Whether a permit is required for the chosen height and material.
- Front-yard, side-yard, and corner-lot height limits.
- Required setbacks from sidewalks, alleys, and curb cuts.
- Historic district or HOA restrictions, which may dictate color, style, and finish.
- Inspection milestones, especially for posts and final height.
One short call to the permitting office prevents the most common installation delays. Permit timelines vary by jurisdiction, and some require a survey or a site drawing before they will issue a permit.
Call 811 and locate utilities
Before any post hole is dug, request a utility locate through 811 (in the United States) or the local equivalent. Buried gas, water, electric, and communications lines can run surprisingly close to a fence line. Marking them is free, takes a few business days, and avoids the kind of mistake that ends a project immediately.
Measure and sketch the run
Walk the fence line with a 100-foot tape, a long measuring wheel, or both, and sketch the run. Note:
- Total linear feet by side.
- Gate locations, widths, and swing direction.
- Slope changes, drainage paths, and any low spots that collect water.
- Trees, large roots, and existing structures the fence has to clear.
- Corners, angles, and any odd jogs in the property line.
Bring this sketch to a supplier or installer. It is the single document that turns a rough idea into a real material list.
Tools and materials for a metal fence installation
The list is not short, but it is also not exotic. Most homeowners already own a meaningful share of it.
| Category | Items | Purpose |
|---|---|---|
| Layout and measuring | Tape, line level, mason line, marking paint, stakes | Establish straight runs and post locations |
| Digging | Post hole digger or one- or two-person auger, shovel, digging bar | Create post holes to the right diameter and depth |
| Concrete and setting | Fast-set concrete mix, wheelbarrow or tub, water source, tamping rod | Set posts plumb and solid |
| Cutting and fastening | Angle grinder or metal-cutting saw, drill-driver, level, socket set | Trim panels, attach brackets, set hardware |
| Safety | Gloves, safety glasses, hearing protection, dust mask | Protect against metal shavings and concrete dust |
| Gates and hardware | Hinges, latches, drop rods, gate stops, self-closing mechanisms if required | Make gates function safely and last |
If the project uses a panel system from a single manufacturer, the supplier will often list a kit-specific tool list. The right time to read that list is before the first hole is dug, not after.
Step-by-step metal fence installation process
Order matters. Each step depends on the one before it, and reversing them is the most common cause of misaligned panels and leaning posts.
Step 1: Lay out the fence line
Drive a stake at each corner and at the start and end of each run. Run a mason’s line between the stakes, level it with a line level, and mark post locations along the line. Standard post spacing is usually 6 to 8 feet, depending on the panel system. Mark each hole with spray paint or a small flag.
For long runs, check the line twice. A 1-degree drift at the start of a 100-foot run can leave the last panel 8 to 10 inches off where it should be.
Step 2: Dig post holes
Post holes should be deep enough to place the post below the local frost line when possible, and wide enough to leave about 3 inches of concrete on every side. A common residential target is 24 to 36 inches deep with a 6- to 9-inch diameter. For gate posts, go deeper and wider; gate stress is the leading cause of leaning posts.
If the soil is rocky or full of roots, an auger helps, but a manual post hole digger is quieter and gives more control in tight spaces. Keep the spoil pile nearby for backfilling and cleanup.
Step 3: Set the posts
Place a few inches of gravel at the base of each hole for drainage. Stand the post in the hole, plumb it on two adjacent sides with a level, and brace it with stakes. Mix fast-set concrete and pour it to within a couple of inches of the surface. Tamping eliminates air pockets and helps the post hold its position.
Let the concrete cure per the bag instructions before hanging panels. Fast-set mixes are usually workable in 20 to 40 minutes, but full strength typically takes 24 to 48 hours. Rushing this step is the most expensive mistake a homeowner can make.
Step 4: Attach brackets and panels
Once the posts are solid, attach the manufacturer’s brackets at the marked locations. Lift each panel into the brackets, level it, and fasten it with the supplied hardware. Check the top line as you go; a 1/4-inch error per panel adds up across a long run.
On sloped ground, rackable panels can tilt with the grade. With For additional context, non-rackable panels, step the fence down in stages instead of forcing a tight fit.
Step 5: Hang the gates
Gate posts carry more load than line posts, and they need concrete footings, not just tamped soil. Hang the gate with the recommended hinges, set the latch height to match the gate’s swing, and add a drop rod on double-drive gates. A self-closer is required for pool enclosures in most jurisdictions.
Step 6: Finish and clean up
Touch up any scratches on powder-coated finishes with the manufacturer’s touch-up paint, since bare steel is where rust starts. Backfill any gaps at the base of the posts, rake out the area, and remove the layout line and stakes. A final walk-through with a level confirms nothing shifted during the work.
Common mistakes in metal fence installation
Patterns repeat across most failed DIY installations. A short list of the ones worth watching for:
- Setting posts in soil instead of concrete. Posts set only in soil lean within a season, especially in clay.
- Ignoring the frost line. Posts that sit above the frost depth heave in cold climates and slowly tilt.
- Skipping permits. Building inspectors can require a fence to come down if the work was not approved.
- Wrong post spacing. Panels that span more than the rated gap flex in wind and eventually fail at the brackets.
- Lazy gate posts. Gate posts need wider, deeper footings than line posts, full stop.
- Forgetting drainage. Low spots under the fence line trap water against the bottom rail and shorten the finish.
- Mixing finishes. Mixing galvanized and black-coated hardware can cause galvanic corrosion at the contact point.
Each of these is a small decision at the right moment and a big problem two years later. A pre-work checklist that names each one is more useful than any tool.
How much does metal fence installation cost?
Costs vary widely by region, product, and site conditions. Two useful reference points: many professional installers charge around $60 per linear foot or more for labor, and DIY panel kits from major suppliers are often quoted in the $35 to $55 per linear foot range for materials only. The exact number depends on height, panel style, terrain, and how much the homeowner does themselves.
For a planning estimate, the line items below cover a typical residential project:
| Cost driver | What affects it | What to budget for |
|---|---|---|
| Panels and posts | Material, height, gauge, finish | Often the largest single line |
| Gates | Single vs. double, width, hardware, self-closer | 1 to 3 gates is common for a yard |
| Concrete and gravel | Number of posts, hole depth, local price | Several bags per post |
| Permits and locates | Local fee, number of utility lines to mark | Often a flat fee; sometimes free |
| Tool rental | Auger, generator, cutoff saw | Daily rates add up on long projects |
| Disposal and haul-off | Old fence removal, concrete, soil | Skip or trailer rental if doing it yourself |
The honest framing is this: a clean, simple layout on flat ground with one or two gates is a different project from a slope with old fencing to remove and several gates. Get the layout right first; the cost follows the work, not the other way around.
DIY vs. hiring a professional for metal fence installation
Both paths can produce a good result. The honest comparison is about time, tools, tolerance for layout work, and how the fence will be used.
| Factor | DIY approach | Professional installation |
|---|---|---|
| Cost | Material cost plus tool rental and your time | Material plus labor, often $60+ per linear foot |
| Time | A weekend to several weekends depending on size | Often one to three days for a typical yard |
| Skill required | Layout, measuring, post setting, basic metal cutting | Same skills, but practiced daily |
| Permits and code | Homeowner handles filings and inspections | Often included in the contract |
| Simple layouts, flat ground, budget-driven projects | ||
| Warranty | Manufacturer warranty on materials only | Workmanship warranty from the installer |
One good rule of thumb: if the fence is straightforward, the homeowner has help, and the layout is a clean rectangle, DIY is reasonable. If the property has slopes, multiple gates, utilities close to the line, or HOA paperwork, a professional tends to be the better deal. For a practical walk-through of how a DIY panel system fits together on a real yard, the BarrierBoss DIY guide shows the basic sequence and the kind of kit-based approach that makes the project accessible to a first-time installer.
Maintenance after metal fence installation
Metal fence maintenance is short, but skipping it is what ages a fence faster than anything else. A simple annual routine covers almost every product.
- Wash the fence once a year with a garden hose and a soft brush. Skip the pressure washer on a hot setting; it can drive water into joints and lift powder coating.
- Inspect for scratches, chips, or rust spots, and touch them up promptly with the manufacturer’s paint.
- Tighten gate hardware and re-adjust the latch as the posts settle.
- Trim vegetation back from the bottom rail to keep moisture and debris from sitting against the finish.
- Check that sprinklers are not aimed directly at the fence; constant wet-dry cycles shorten the finish on most products.
Galvanized and powder-coated finishes are designed to be low-maintenance, not no-maintenance. A few minutes once a year is the difference between a fence that looks good at year ten and one that looks tired at year three.
Choosing the right metal fence for the property
Once the layout and the budget are clear, the decision usually comes down to a few specific questions:
- Is the goal privacy, security, ornament, or a simple boundary?
- How does the fence need to behave on a slope?
- What is the local climate, especially salt air or freeze-thaw cycles?
- Will the fence need to meet a pool code, HOA rule, or a specific wind load?
- How important is color matching to the house or the existing trim?
Answering these in writing before contacting a supplier is the simplest way to avoid a sales conversation that drifts toward the most expensive product on the rack. The right fence is the one that matches the answers, not the one that has the most options.
A short checklist before the first post goes in
Before the project starts, a single printable list is more useful than another chapter. A practical pre-work checklist:
- Property line confirmed and corners marked.
- Permit application filed and approval received, where required.
- Utility locate requested and all marks visible on the ground.
- Total linear feet measured, with a sketch of the run and gate locations.
- Material list matched to the sketch, with a small surplus for cuts and mistakes.
- Tools, hardware, and concrete on site before the first hole is dug.
- One extra pair of hands scheduled for the panel and gate day.
If every box is checked, the project is in a strong position. If two or more are open, the day is better spent closing them than starting to dig.
Frequently asked questions
How long does a typical metal fence installation take?
For a homeowner with one or two helpers, a 100- to 150-foot single-side fence with one gate usually takes two to four working days, including post setting and cure time. Larger projects, multiple gates, or sloped ground push that into a full week. Professional crews can often finish the same scope in one to three days because they pour and set posts in larger batches.
Do I need a permit for a metal fence installation?
Most jurisdictions require a permit for fences over a certain height, often 4 to 6 feet, and almost always for pool enclosures. Even where a permit is not required, local rules typically set maximum heights, front-yard limits, and corner-lot visibility requirements. A quick call to the local building or planning office before the project starts avoids rework later.
How deep should fence posts be set?
A common residential target is 24 to 36 inches of depth, with about 3 inches of concrete on every side. In cold climates, the post should sit below the local frost line to avoid heaving. Gate posts should always be set deeper and in a wider footing than line posts, since they carry the most stress.
Can metal fencing be installed on a slope?
Yes, but the panel system matters. Rackable panels can tilt to follow the grade for a smooth top line. Non-rackable panels have to be stepped down in stages, which creates a more visible terraced look. Very steep slopes sometimes need a hybrid approach with custom panels or partial retaining structures.
What is the most common mistake homeowners make during metal fence installation?
Underestimating the post foundation. Posts that are too shallow, set in soil without concrete, or undersized for gate stress are the leading cause of leaning fences. The post is the part of the fence that is hardest to fix later, so it is the part worth overbuilding from the start.
How do I prevent rust on a metal fence?
Pick a galvanized or powder-coated product, follow the manufacturer’s installation guidelines, and touch up any scratches or chips the moment they appear. Keep sprinklers and irrigation aimed away from the fence, and rinse off salt or fertilizer residue as part of a once-a-year wash.
What height works best for a backyard privacy fence?
Six feet is the most common residential privacy height and the maximum allowed in many jurisdictions without a special permit. Eight-foot panels are available but often trigger additional review, and they need deeper post settings to handle the added wind load. Local code is the final word, and the place to confirm it.
Should I choose aluminum or steel for residential metal fence installation?
Aluminum is lighter, naturally rust-resistant, and easier to handle, which makes it a good fit for ornamental and pool applications. Steel is stronger and stiffer, which is why it is used for privacy panels, security fencing, and gate frames. In coastal areas with salt spray, marine-grade aluminum or properly coated steel both perform well, but bare steel does not.
Can I install a metal fence myself, or do I need a professional?
Many homeowners successfully install a metal fence themselves, especially with a kit-based panel system and a clean rectangular layout. The project becomes more demanding on slopes, with multiple gates, near buried utilities, or in jurisdictions that require inspections at specific stages. A professional is the safer choice for complex layouts or for homeowners who would rather pay for a workmanship warranty than learn the trade on their own fence.
How long will a metal fence last?
Quality aluminum and properly coated steel fences commonly last 20 to 30 years with basic annual maintenance. Light-gauge products and neglected finishes can fail in half that time. Climate, soil chemistry, and how quickly scratches are addressed are the variables that move the number up or down.
Leave a Reply