


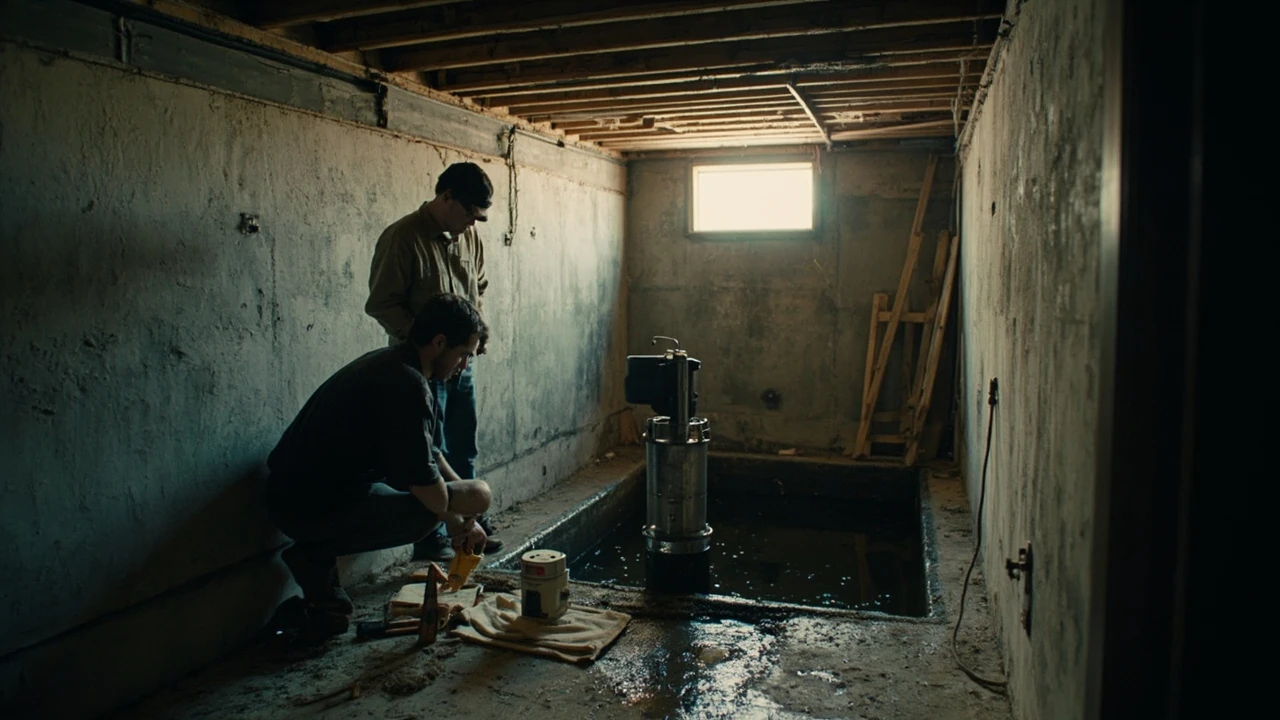
Sump pump installers: how to hire the right pro for a dry basement
Standing water in a basement is rarely a mystery. The water table rises, perimeter drains clog, a storm pushes rain against the foundation, and a small basin in the lowest corner of the floor quietly fills until it overflows. The piece of equipment that prevents that scene is a sump pump, and the people who size it, wire it, and connect it to a discharge line are sump pump installers. Choosing the wrong one turns a routine job into a recurring flood; choosing well turns a basement into usable square footage.
Homeowners usually search for installers after a first scare: a wet carpet, a musty smell that won’t go away, or a finished basement that loses a section of drywall after a single storm. By that point, the question is no longer “do I need a pump?” but “who do I trust to do this right, and how do I tell a qualified installer from someone who just owns a truck and a drill?” The guidance below walks through the decisions, site checks, and paperwork that separate a good installation from an expensive redo.
Why the right installer matters more than the pump brand
Sump pumps are not particularly complex machines. A residential unit is essentially a motor, an impeller, a float switch, and a one-way check valve. The hardware itself is largely commoditized, and the same brands show up on trucks across most regions. What differs sharply between contractors is everything around the pump: how the basin is set, how the discharge line is run, how the electrical is wired, and whether the system is designed to keep working when the power is out at 2 a.m. during a thunderstorm.
According to the description of sump pump operation maintained in the English Wikipedia article on the subject, sump pumps are used to remove water that has accumulated in a water-collecting sump basin, with water entering through perimeter drains or through ground water seepage, and pumps send that water to a storm drain, dry well, or downhill discharge point. The same article notes that many homeowners have inherited sump pump configurations they do not fully understand, including older installations that discharge into sanitary sewers and may now violate local plumbing rules. That last point is a good illustration of why the installer matters: a knowledgeable pro reads the existing setup and flags code issues that a less careful one will simply reconnect.
Three categories of mistake are common in bad installations. First, the pump is undersized for the home’s water load, so it cycles constantly and burns out in two or three years. Second, the discharge line has no proper check valve or has a check valve installed backwards, so water siphons back into the basin every time the pump shuts off, forcing the pump to run again immediately. Third, the basin is set on a gravel base without proper venting or a sealed lid, which lets radon and soil gas migrate into the living space. None of those problems are visible from the pump’s brand label; they only show up in how the installer plans the job.
What a sump pump installer actually does on a site visit
A first visit from a sump pump installer is part inspection, part interview. The installer is gathering information to size the system correctly and to flag conditions that change the scope of the work. Homeowners who understand what is being checked can evaluate the quality of that visit, rather than simply accepting a verbal quote.
Typical items on a real site assessment include:
- Locating or proposing a sump basin location, usually at the lowest point of the basement floor near a foundation wall.
- Measuring the depth of the existing basin or the depth required for a new one, since most residential basins are a minimum of 18 inches in diameter and 30 inches deep.
- Checking the water table conditions, evidence of past flooding, and the height of any water staining on the foundation walls.
- Tracing the perimeter drain tile, if one exists, and confirming whether it ties into the basin or runs somewhere else.
- Identifying a discharge route that moves water away from the foundation and complies with local code, whether that is a storm drain, a dry well, or a daylight exit downhill.
- Inspecting the electrical panel for a dedicated circuit and GFCI requirements, since sump pumps benefit from a dedicated receptacle on a circuit that is less likely to be tripped.
- Looking for radon mitigation in place, because adding or modifying a sump cover without sealing it properly can change indoor air quality.
- Asking about past power outages, basement occupancy, and finished space, all of which influence the choice of backup power.
An installer who quotes a price without doing most of those checks is usually quoting a number that will change once the crew is on site. A careful visit also surfaces upsells that may or may not be warranted, which is easier to evaluate when the homeowner has seen the same questions answered elsewhere on the property.
Pedestal vs. submersible: the first real decision
Residential sump pumps come in two physical configurations, and an installer should explain both before recommending one. The choice affects cost, noise, service life, and how easy future repairs will be.
| Feature | Pedestal sump pump | Submersible sump pump |
|---|---|---|
| Motor position | Sits on a column above the basin, not sealed against water | Sealed inside a housing that sits in the water at the bottom of the basin |
| Typical service life | Often shorter; the exposed motor and shaft wear faster | Generally longer because the motor is cooled and protected by the water |
| Noise | Noticeable in finished basements because the motor is above the floor | Quieter, especially with a sealed basin lid |
| Best fit | Unfinished utility spaces, tight budgets, basins that cannot be covered | Finished basements, radon-sensitive homes, and most new installations today |
| Switch design | Switch is usually in the motor housing on the column | Often uses a piggyback float or pressure switch that can be replaced without pulling the pump |
The historical context is useful here. Pedestal pumps were the only residential option for most of the 20th century, but improvements in seals and switch design made submersible pumps much more reliable, and the compact shape allows the basin to be covered. A covered basin reduces a trip-and-fall hazard and helps limit radon intrusion. For most modern homes, the installer is likely to recommend a submersible unit unless the budget is unusually tight or the basin geometry makes a pedestal practical.
Sizing the pump: horsepower, head pressure, and gallons per hour
Sump pump sizing is not just about horsepower. A 1/3 HP pump in a home with a high water table and a long discharge run can be overwhelmed just as easily as a tiny pump in a quiet basement. The installer needs to think about three numbers together: how much water arrives, how high and far it has to be moved, and how much the pump can move under those real conditions.
| Sizing factor | What it means | How the installer measures it |
|---|---|---|
| Static head | The vertical distance the water must be lifted from the basin to the discharge point | Measured from the basin bottom to the highest point of the discharge line |
| Friction loss | The pressure lost as water moves through pipe, fittings, and the check valve | Estimated from pipe diameter, length, number of elbows, and the check valve rating |
| Gallons per hour (GPH) at required head | The real flow the pump can deliver once head and friction are accounted for | Read from the pump curve at the total dynamic head, not at zero head |
| Basin fill rate | How quickly water enters the basin during a storm or high water table | Estimated from soil type, drain tile condition, and observed pump cycling |
| Run time per cycle | How long the pump actually runs each time it starts | Tracked after installation; a short run time with frequent starts usually means the pump is oversized |
A 1/3 or 1/2 horsepower submersible pump operating on a standard 115-volt residential circuit covers most single-family basements. The installer should still verify that the pump’s performance curve at the home’s specific total dynamic head is high enough to clear the basin between storms. Slight oversizing is generally safer than slight undersizing, because cycling too often shortens motor life and can leave the basin nearly full at the moment power goes out.
Discharge routing and the check valve
Where the water goes after it leaves the pump is a decision that involves code, hydraulics, and the home’s exterior layout. Common discharge options include a storm drain connection, a dry well at least 10 feet from the foundation, or a daylight exit that lets gravity carry the water away downslope. A pump that discharges into a sanitary sewer may still be found in older homes, but that practice is increasingly prohibited because it can overload municipal treatment systems during peak storms.
Inside the discharge line, the single most important component is the check valve, also called a one-way valve. Its job is to keep the column of water in the vertical discharge pipe from falling back into the basin every time the pump shuts off. Without a check valve, the pump would essentially lift the same water on every cycle, which wastes energy and dramatically shortens motor life. A few practical points installers should handle:
- Install the check valve in the correct direction; many are designed for vertical installation, and an arrow or label marks the flow.
- Use a check valve with a cleanout port or a union on at least one side so debris can be cleared without cutting pipe.
- Drill a small, controlled weep hole above the check valve on some installations so the pump does not slam against a closed valve each cycle, a common cause of switch failures.
- Pitch the horizontal discharge line slightly back toward the pump or include a small air-relief path so the line drains cleanly between uses.
The exterior end of the discharge line should also be protected. A grated termination that faces down or out, placed at least 10 to 20 feet from the foundation, prevents backflow of water toward the house and keeps small animals from nesting in the pipe. In freezing climates, installers sometimes bury the discharge line below the frost line and route it to a bubbler pot or a dry well, which avoids an ice plug at the exit.
Electrical and backup power
For additional context, Because the pump must work exactly when the power is most likely to fail, the electrical design deserves as much attention as the pump itself. A sump pump is normally plugged into a standard receptacle, and the safest arrangement is a dedicated circuit that is less likely to share a tripped breaker with other appliances. In some jurisdictions, the dedicated circuit is allowed to omit GFCI protection because GFCI devices in this location can nuisance-trip during storms, which is the worst possible time for the pump to lose power.
Options the installer should walk through with the homeowner include:
- Hardwiring the pump instead of leaving it plugged in, so the plug cannot be accidentally disconnected.
- A receptacle with a retaining bracket that physically blocks the plug from being pulled out.
- A clearly labeled breaker marked “do not turn off” so other household members do not switch the pump off for noise or perceived vibration.
- A battery backup system, either integrated with the primary pump or as a separate pump with its own float switch set slightly higher than the main one.
- A water-powered backup pump, which uses municipal supply pressure to run a turbine-driven pump; this design eliminates the need for electricity but consumes potable water and may be restricted by local code.
- A small generator with a manual transfer setup, useful where storms regularly cause multi-day outages.
The capacity of the backup system is more important than the brand. A battery that can run a small DC pump for 8 to 12 hours of intermittent cycling is a reasonable target for most homes. A generator sized for the pump’s starting watts, which can be roughly 1.5 times the running wattage, will run the primary pump indefinitely but requires the homeowner to set it up before the storm. Each option has trade-offs that the installer should price and explain rather than simply defaulting to a single answer.
What good installers bring to the quote
A written quote from a sump pump installer should be detailed enough that the homeowner can compare one company against another. Verbal quotes and vague line items tend to hide exactly the decisions that drive cost and quality. At a minimum, a useful proposal names the equipment, the scope of work, and the terms of the warranty.
| Quote line item | What to look for | Why it matters |
|---|---|---|
| Basin | Material (fiberglass, ABS plastic, concrete), diameter, depth, lid type, and whether it is sealed | Determines pump fit, radon exposure, and child/pet safety |
| Pump model | Specific brand, horsepower, voltage, max head, and GPH at the expected head | Prevents a “compatible” substitution with a lower-quality unit |
| Check valve | Size, type, and whether a union or cleanout is included | Affects future serviceability and long-term reliability |
| Discharge piping | Material, diameter, route, and termination type | Drives freeze, noise, and backflow risk |
| Whether a new dedicated circuit is included, who pulls the permit, and GFCI status | Code compliance and tripping risk | |
| Backup system | Battery capacity, expected run time, alarm, and whether it is a separate pump | Real performance during outages |
| Permits and inspection | Plumbing or electrical permit, inspection by the local building department | Indicates the installer is willing to have the work reviewed |
| Warranty | Length and what it covers: pump, basin, labor, and consequential damage | Separates manufacturer warranty from installer workmanship |
| Cleanup and restoration | Concrete patching, floor finishing, and disposal of debris | Prevents surprise add-ons at the end of the job |
Two more documents belong in the conversation: proof of insurance and the local license number for plumbing or specialty work, where the jurisdiction requires one. A homeowner can verify both with a quick call to the city or county. Installers who cannot produce either should be passed over, regardless of price.
Red flags when talking to sump pump installers
Most bad experiences with sump pump installers start with a conversation that should have raised doubt. The list of warning signs is short but reliable.
- A quote given entirely over the phone without any site visit, especially on a first-time installation where the basin does not yet exist.
- Pressure to “replace everything” before the existing system has been inspected, often paired with a discount that expires within 24 hours.
- No mention of a check valve, a dedicated circuit, or backup power; these omissions signal that the quote covers the pump only.
- Refusal to provide a written scope, an itemized price, or a warranty in writing.
- Cash-only pricing or a request that the homeowner pull the permit to “save money”, which usually means the installer is not licensed for the work.
- Recommendations that contradict the home’s actual conditions, such as installing a 1/3 HP pump in a home that already cycles a 1/2 HP unit too often.
A useful counterweight is a short second opinion. Even if the second installer is not hired, a second visit usually surfaces details the first one missed and gives the homeowner a basis for comparison. Basement waterproofing is a service category where high-pressure tactics are common enough to be a recognized pattern.
Questions to ask sump pump installers before signing
A short, focused list of questions during the estimate does more than gather information. It also signals to the installer that the homeowner is paying attention, which tends to raise the quality of the response. The questions below cover the decisions that matter most.
- Which pump brand and model are you recommending, and why is it sized for this home’s water load?
- What is the expected total dynamic head, and what flow rate will this pump deliver at that head?
- Will the basin be sealed, and is radon a concern in this neighborhood?
- What kind of check valve will you install, and is it serviceable without cutting pipe?
- Where will the discharge water go, and does that meet local code?
- Is a dedicated electrical circuit included, and who handles the permit and inspection?
- What backup power option do you recommend, and what run time should I expect?
- What is the warranty on the pump, the basin, and your labor, and what does it exclude?
- What is the timeline from signed contract to completed work, and what does the site look like at the end of each day?
Written answers to those questions, even in an email reply, give the homeowner something to compare between bidders. They also make it harder for a less experienced installer to substitute equipment mid-job without the homeowner noticing.
Cost ranges and what drives them
Sump pump installation costs vary widely by region, basin condition, and whether the job is a replacement or a first-time install. Rather than promising a specific number, a useful approach is to look at the components and what each one contributes. National cost guides are useful, but only as a starting point; the actual price is shaped by the home.
Common cost drivers include:
- Whether a new basin must be cut into the concrete floor, which involves jackhammering, gravel base, and patching.
- The length and complexity of the discharge line, especially if it must run through finished space or be trenched outside to a dry well.
- Whether the electrical panel has spare capacity for a new dedicated circuit or requires a subpanel.
- Backup power choices, from a simple battery unit to a generator with a transfer switch.
- Local permit and inspection fees.
- After-hours or emergency pricing, which is common when a pump fails during a storm and the basement is actively flooding.
Homeowners should also plan for a follow-up cost. A sump pump is a wear item, and even a well-installed unit typically lasts 7 to 10 years before the motor or switch reaches the end of its service life. Factoring that replacement cycle into the budget keeps the decision honest.
How sump pump installers fit into a broader home project
Sump pump work is often part of a larger project, not a standalone job. A finished basement renovation, a new HVAC system in the basement, or a perimeter drain replacement can all change what the sump pump installation needs to do. A kitchen remodeler building out a basement wet bar, for example, may need the sump basin moved or its lid raised to accommodate new flooring. A boiler service visit, on the other hand, may reveal that the boiler condensate line is discharging into the sump basin, which is fine when the pump runs but a real problem during a power outage.
Two practical habits help. First, the homeowner should tell the sump pump installer about any other work planned in the next six months so the basin, lid, and discharge routing can be planned once instead of redone. Second, after the install, the homeowner should keep a short written record of pump model, basin depth, switch type, and discharge route. That record is invaluable the next time a different contractor asks what is in the floor, and it shortens any future service call.
Maintenance after installation
An installed sump pump is not a “set and forget” appliance. The installer should leave the homeowner with a simple maintenance routine, and a good one will offer an annual or biennial checkup. The routine itself is not difficult.
- Pour a bucket of water into the basin every few months to confirm the float switch trips, the pump runs, and the discharge line actually flows outside.
- Listen for short cycling, grinding, or humming that does not produce flow; any of those usually points to a failing switch or a partially blocked impeller.
- Check the check valve once a year for weeping, which suggests debris on the seat or a worn seal.
- Test the battery backup according to the manufacturer’s schedule, usually every 6 to 12 months, and replace the battery on its own timeline rather than waiting for a failure.
- Keep the basin cover clear of stored items; blocking the lid or stacking boxes on it delays access during an emergency.
- After any major storm, walk to the discharge point outside and confirm water is exiting, not pooling at the foundation.
A pump that is exercised regularly almost always outlasts one that sits untouched for years. Service intervals for an unfamiliar system can be set in a phone calendar, and many installers will send a reminder as part of a maintenance contract.
Frequently asked questions
How do I know if I need a sump pump at all?
Common signs include water stains on basement walls, a musty smell that returns after cleaning, efflorescence on concrete, visible water in a corner after rain, and a high water table in the neighborhood. A quick visit from a sump pump installer can confirm whether the conditions justify a pump or whether a different fix, such as grading or a French drain, will address the problem.
What size sump pump does a typical home need?
Most single-family homes end up with a 1/3 or 1/2 horsepower submersible pump, but the right size depends on the home’s water load and the total dynamic head of the discharge run. The installer should calculate the head and read the pump curve, not just pick a horsepower from a chart.
Do sump pump installers need to be licensed?
Licensing rules vary by state and municipality. In many places, sump pump installation falls under plumbing, which requires a license; in others, only the electrical portion requires licensing. The homeowner should ask for the installer’s license number and verify it with the local building department before work begins.
How long does a sump pump installation take?
A like-for-like replacement of an existing pump and check valve can take as little as one to two hours. A first-time installation that includes cutting a new basin into a concrete floor, running a new discharge line, and adding a dedicated circuit usually takes a full day, sometimes two, especially if the concrete needs to cure before the lid is sealed.
What is the difference between a pedestal and a submersible sump pump?
A pedestal pump sits on a column above the basin with the motor exposed to air, while a submersible pump sits inside the water with a sealed motor. Submersible pumps are generally quieter, last longer, and allow the basin to be covered, which reduces radon intrusion and trip hazards.
Should I get a battery backup sump pump?
A battery backup is a sensible choice for any home that relies on a sump pump to keep finished space dry, especially in regions with frequent storms or unreliable grid power. A separate battery-powered pump with its own float switch set slightly higher than the primary pump is a common configuration. The exact battery capacity should be matched to the home’s outage risk.
How often should a sump pump be replaced?
Most residential sump pumps last 7 to 10 years, with some lasting longer in light-duty service and some failing sooner under heavy cycling. The float switch is the most common point of failure, and submersible pumps with replaceable piggyback switches are easier to service than sealed units. An annual test by pouring water into the basin is the simplest way to catch early problems.
Can a sump pump discharge into a sanitary sewer?
In some older homes, yes, but many municipalities now prohibit the practice because the extra water can overwhelm treatment plants during storms. Homeowners often inherit a setup they do not realize is noncompliant, and fines may apply. A qualified installer can reroute the discharge to a storm drain, dry well, or daylight exit that meets current code.
Will a sump pump installation lower my home insurance premium?
Not directly, but a working sump pump and a backflow preventer or water alarm can reduce the risk profile of a home in a flood-prone area, which some insurers recognize. The bigger financial benefit is avoiding a single claim, since even an inch of water in a finished basement can cost more than a full professional installation.
What should I do if my sump pump stops working during a storm?
First, stop the water at the source if possible, by avoiding extra household water use and by checking that the discharge line is not blocked. If the pump is silent and the outlet has power, the switch has likely failed; if there is no power, the breaker has likely tripped. A battery backup should take over automatically; if it does not, the homeowner should call a 24-hour service number kept near the panel.
Leave a Reply